Clearing out your Google Drive, Gmail, and Google Photos is a simple way to create more space on your virtual storage, and it might also help you save money. Google provides users with 15GB of free storage for Google Drive, Gmail, and other services. This storage can fill up quickly. When you’re getting close to using it all, Google will suggest purchasing extra storage through a subscription called Google One. Alternatively, you can use these tips to organize your digital storage and keep your money in your pocket.
Here’s a guide on how to clear up space in Google Drive, Gmail, and Google Photos on both desktop and mobile, so you don’t need to pay for extra storage. It’s better to do this on your computer instead of a mobile device, as it’s simpler to sort and manage files that way. Rest assured, we’ll guide you through the steps for both desktop and mobile platforms.
First Remove Large Files
If you only need to remove a few things from Google Drive and Gmail to make more space, you can arrange each service by the size of files. Instead of deleting several smaller items, you can delete one or two larger files.
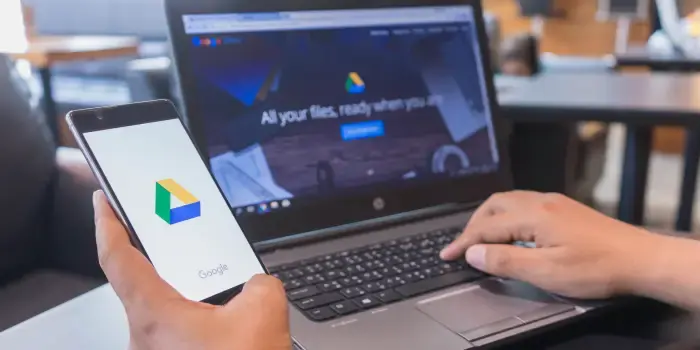
How to Delete Large Files from Google Drive
- You first have to make sure you have already logged in to your Google Drive account.
- Select “Storage” from the menu located on the left side of the screen.
- The Storage page will display your files starting with the largest ones and going down to the smallest. If this order isn’t shown, click on “Storage used” on the right side of the screen. This should arrange the files from the largest to the smallest.
- Click on the large files you wish to remove to choose them. After selecting, you can either click on the trash bin icon that appears at the top of the screen or drag the large files to the “Trash” section on the left side of the screen.
- To access the Trash section, click on “Trash” in the menu located on the left-hand side.
- Click on “Empty trash” located in the top-right corner of your screen.
- Click on “Delete forever,” and your files will be permanently removed.
How to Delete Large Files from Google Drive in the Google Drive App
1. Open the Google Drive app and log in to your account.
2. Tap on “Files” located in the bottom-right corner of the screen.
3. Under “My Drive,” tap on “Name” near the top of the screen.
4. Tap on “Storage used.” This will organize your files from largest to smallest.
5. Find the item you want to delete and tap the three dots (…) next to it.
6. Tap on “Remove.”
7. Go back to the main screen by tapping the hamburger icon (three horizontal lines) at the top-left corner, next to “Search in Drive.”
8. Tap on “Trash.”
9. Tap the three dots (…) in the top-right corner of the screen.
10. Tap on “Empty trash.”
You can also organize and delete files by size in Gmail on your computer. Here’s how:
1. Log in to your Gmail account.
2. In the search bar, type “has:attachment larger:10MB” (for example) and press Enter. This will display emails with attachments larger than 10MB, arranged from largest to smallest. You can adjust the size value to filter by different file sizes.
3. Select the checkboxes on the left of the emails you want to delete. Then, click on the Trash icon located in the top-right corner of the screen.
4. To access the Trash menu, click on “Trash” on the left side of the screen. If you can’t find “Trash,” click on “More,” and you should see “Trash” in the expanded menu.
5. Once in the Trash, click on “Empty trash now” at the top of the screen.
By following these steps, you can efficiently manage and remove large email attachments in Gmail on your computer.
How to Arrange and Delete Files by Size in Gmail 
1. Open your Gmail app and sign in.
Gizchina News of the week
2. Type “has:attachment larger:10MB” in the search bar and press Search. This will show emails with attachments bigger than 10MB, starting from the biggest. You can use this to find other sizes too, not just 10MB.
3. Click on the email you want to remove.
4. Click the trash bin icon at the top-right.
5. Click the back arrow at the top left.
6. Click the three-line icon at the top-left next to Search in mail.
7. Click on Trash.
8. Click Empty trash now.
Remember, items in the Trash will be deleted automatically after 30 days.
Empty the Spam Folder in your Gmail Account
Forgetting to empty your spam folder can use up extra space in your Gmail account. It’s also a good idea to clear out your social or promotions folders. This helps you create more room in your account.
How to Empty Spam Folder on Desktop
1. Sign into your Gmail account.
2. After signing in, click on “Spam” on the left side of the screen. If you can’t find “Spam,” click “More.” You’ll see “Spam” in the list that appears.
3. Inside your Spam folder, click “Delete all spam messages now.”
How to Empty Spam Folder in Gmail App
1. Open the Gmail app and sign in.
2. Tap the three-line icon in the top-left next to the search box.
3. Tap “Spam.”
4. Tap “Delete all spam messages now” or “Empty spam now.”
Delete Unwanted Photos and Videos from your Google Photos 
Google also provides 15GB of free storage that covers Google Photos. Pictures and videos can use up more space than documents, so it’s a smart move to review and remove old photos and videos to free up space.
Yet, unlike Google Drive and Gmail, there’s no way to sort your photos and videos by size. Therefore, you’ll need to manually go through them and delete what you don’t need to clear up space.
How to Delete Photos and Videos from Google Photos on Desktop
1. Open Google Photos and sign in.
2. Hover your mouse over the photos and videos you want to remove. Click the gray check mark at the top-left corner of each item.
3. Tap the trash icon at the top-right.
4. Select “Move to trash.”
5. Find and tap “Trash” on the left side.
6. Click “Empty trash” near the top-right.
7. Confirm by clicking “Empty trash” again, and you’re done.
How to Delete Photos and Videos from Google Photos Mobile App
Attention, Apple users: If you connect your Gmail to your iCloud account, these two storage spaces might be linked. This means that if you turn on the Backup & Sync feature in Google Photos, the pictures from your iPhone might also appear in Google Photos. If you delete a photo in Google Photos, it could also be deleted from your iPhone. As a result, the photo won’t show up in iCloud either. You’ll notice this when trying to delete an image in Google Photos—a message will pop up, warning you that you’re deleting it from both places.
1. Open Google Photos and sign in.
2. Touch the photo or video you want to remove.
3. Tap the trash can icon at the bottom-right.
4. Choose “Delete.”
5. Tap “Library” at the bottom-right.
6. Tap “Trash.”
7. Click the three dots (…) at the top-right.
8. Pick “Empty trash.”
9. Confirm by tapping “Delete.”
If you don’t select “Empty trash” on either platform, the photos and videos you’ve deleted will be automatically removed after 60 days.
Conclusion
As you can see, there are so many ways through which you can free up a lot of space in your Google Drive. We all have a lot of photos and videos inside our Google Drive accounts that we don’t really need. Therefore, do not rush to purchase a cloud storage when your Google Drive gets full. Make good use of the steps discussed above and you could save more space and save your money as well.
Via: gizchina.com